

Creating digital art means working through a lot of tools and features. Procreate is one of the most popular apps for artists who work on the iPad, and it packs professional drawing tools into a straightforward interface.
This post walks through practical tips and details that help you get more out of your artwork on the iPad using Procreate’s drawing and painting tools. It covers what the app is, why artists use it, the features that matter, and the habits that make your work go faster. Read on to see what the app can do.
Key Takeaways
- Procreate turns your iPad into a digital canvas and is known for its high-quality brushes and easy-to-use interface. Its latest version can export directly to Procreate Dreams for 2D animation.
- The app has a detailed layering system and features like the Valkyrie engine for smooth performance, plus canvases that support ultra-high resolutions for detailed work.
- You can customize your tools extensively, from adjusting brushes to importing new ones from outside sources. Effects and filters add depth to a piece.
- Knowing the interface, using gesture controls, and keeping up with software updates all make your work go faster.
- Handling layers well — with alpha locks, clipping masks, blend modes, and grouping — lets you build complex artwork and still edit it non-destructively.
What is the Procreate App?
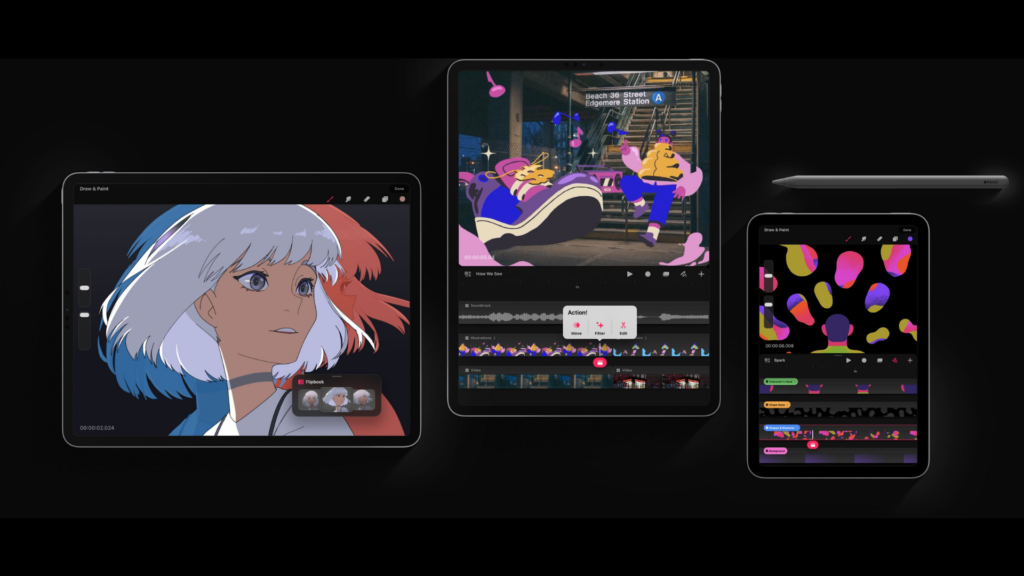
Procreate turns your iPad into a digital canvas. The app is known for its large library of handmade brushes, which let artists sketch, paint, and design with a lot of range.
It is more than a wide set of tools. Procreate also gives you an advanced layering system that stacks layers of detail the way tracing paper does in a studio. You can build a piece up one layer at a time, keep parts of it separate, and change any layer later without touching the rest of the drawing.
The app runs on Valkyrie, a painting engine built for speed and precision on the iPad screen. Whether you are adjusting tiny details or working on a large piece, Procreate keeps the strokes smooth.
Once your work is done, the 5.3.7 update lets you export straight into Procreate Dreams, which opens up 2D animation and storytelling.
Advantages of Using the Procreate App for Digital Art
Getting the most out of your digital artwork is easier with Procreate’s wide range of artistic tools. You get access to more than a hundred custom-built brushes, each made for a specific texture and stroke.
The app pairs those tools with a detailed layering system, so you can adjust your work with precision and edit it without much trouble. Instead of committing every change to one flat image, you keep the pieces of your artwork on separate layers and go back to any of them as the piece takes shape.
Because canvases support ultra-high resolutions, even the smallest details in your artwork stay sharp. The interface is tuned for the iPad’s touch controls and the responsiveness of the Apple Pencil, so drawing feels natural.
The benefit is a workspace that keeps up with what you want to make. On top of its speed, Procreate works alongside tools like Adobe® Photoshop®, so your workflow stays intact when you move a file between apps.
Essential Features of the Procreate App
With its sketch, paint, and create functionality, a wide range of brushes and tools, and a detailed layering system, Procreate gives digital artists a solid platform to work on.
Keep reading to see how these core features work and how each one can improve your digital art, from the way brushes handle to how layers keep a complex piece organized.
Sketch, Paint, Create Functionality
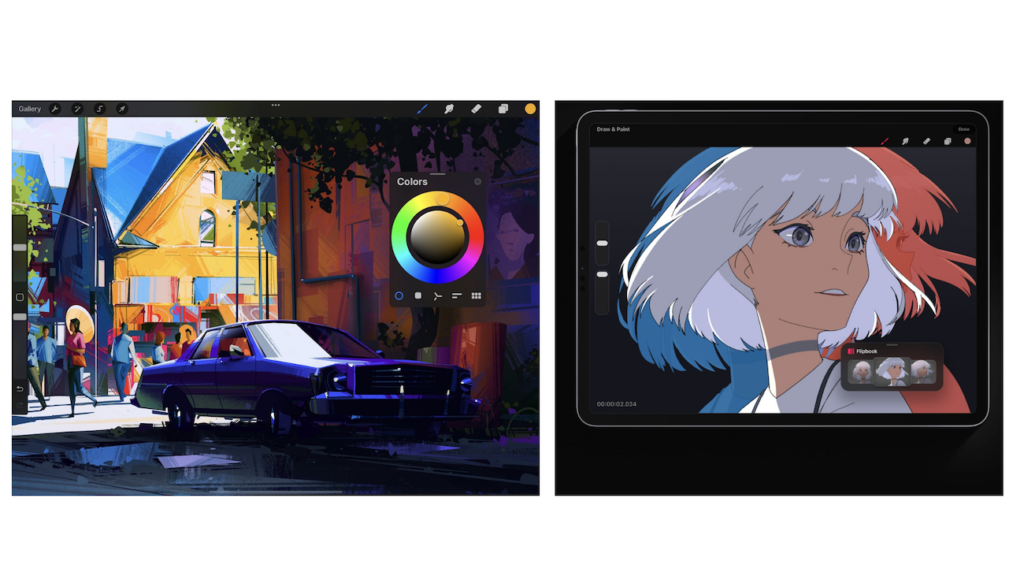
Get more out of your work with the Procreate app’s “Sketch, Paint, Create” functionality. It gives you a digital canvas with hand-built tools and brushes ready to draw with.
| Feature | Description |
|---|---|
| Hundreds of high-quality brushes | Procreate gives you a large set of brushes for many styles and techniques. Whether you are drawing fine lines or filling broad areas, each stroke on the screen feels natural. |
| True-to-life sketching | Procreate mimics the feel of traditional drawing tools. Pencil strokes look and behave like graphite, so moving from paper to digital is straightforward. |
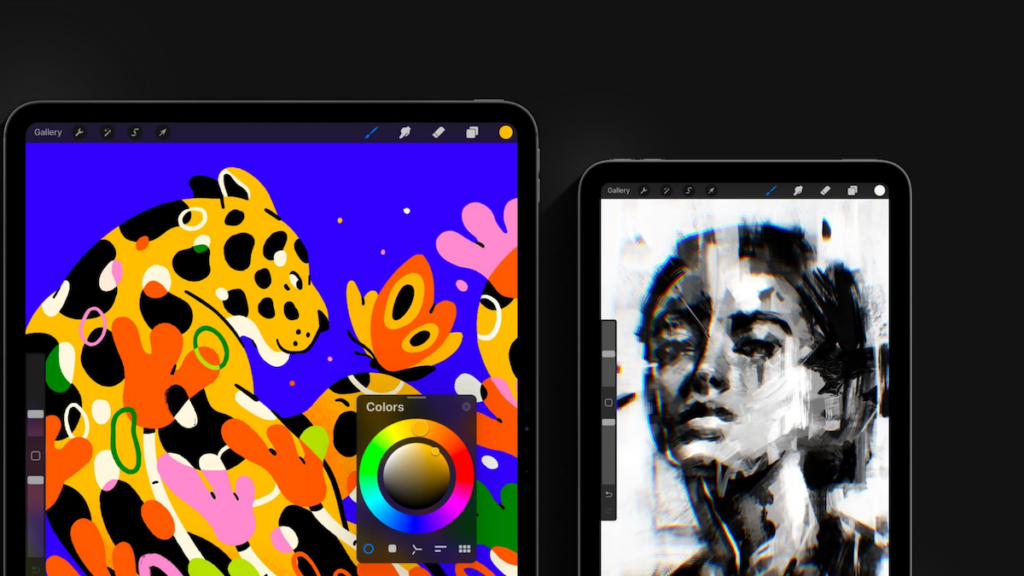
| Vibrant painting options | With a full color palette, you can blend shades the way you would with real paint. The colors are rich and accurate, so your artwork stands out on screen. |
| New artistic tools | Push your work further with tools that add textures or special effects. These features help artists get finishes that stand out in digital work. |
| Create without limits | The app’s strong performance means you can build complex artwork quickly without lag. You are free to work fast across Procreate’s responsive interface. |
| Share your work easily | When a piece is done, export your art in several file formats or as Adobe® Photoshop® PSD files, which makes sharing your digital work simple. |
Variety of Brushes and Tools
Procreate offers a wide range of artistic tools, including hundreds of handmade brushes and new artistic tools. Here are the main features worth exploring:
| Feature | Description |
|---|---|
| Handcrafted Brushes and Tools | Work with a large selection of handcrafted brushes and tools made for different styles, from sketching and inking to painting and detail work. |
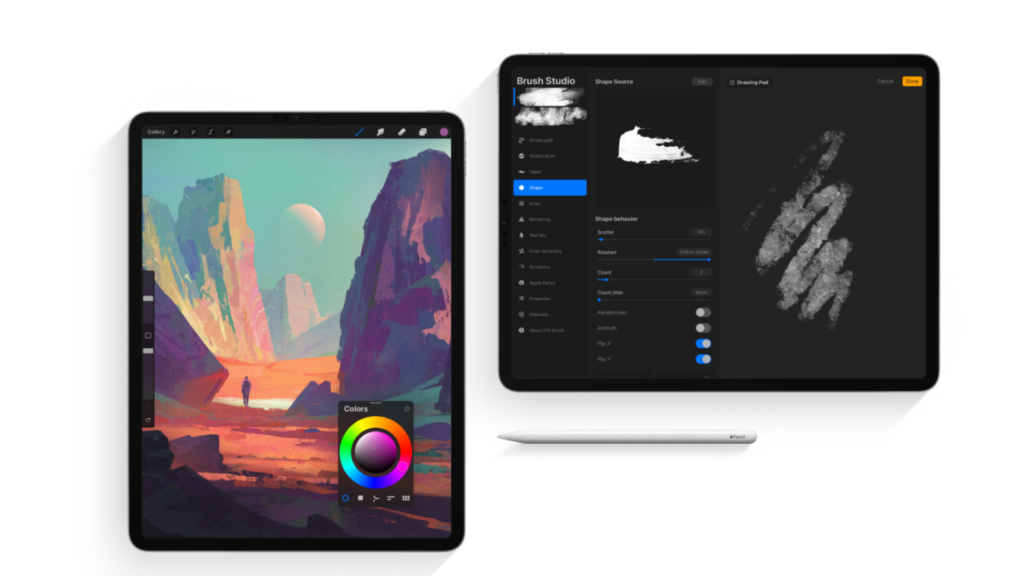
| Advanced Brush Customization | Adjust brush settings like shape, texture, dynamics, and blending modes to set up brushes the way you want them. |
| New Artistic Tools | Try tools built for digital art, such as the smudge tool for smooth blending and the warp transform for fluid adjustments. |
| Specialized Toolsets | Reach specialized sets of tools made for specific techniques or effects, which gives you flexibility on different creative jobs. |
| Importable Brushes | Import thousands of extra brushes from outside sources to expand your toolkit past the app’s preloaded options. |
| Effects and Filters | Use effects and filters to add depth, texture, and atmosphere to your artwork. |
Advanced Layering System
Procreate has an advanced layering system that lets artists build detailed, complex digital designs without much friction. This feature is a big part of the high-quality art you can produce quickly in the app.
Users and critics have praised the layering system, and it is a large reason the app holds an 4.5 out of 5 rating across more than 39K reviews. The latest version also fixes an issue with dragging brushes from Procreate into the 2D animation app, Procreate Dreams.
Some users have asked for even more from the layering system, such as text and shape tools that would sit alongside the current drawing and painting features. It is worth noting that Procreate’s privacy practices collect no data from the app, which keeps both the layering system and the artwork made in it secure and private to you.
Tips and Tricks for Mastering Procreate App
Here is how to move around the interface, work with different brushes, and handle layers in Procreate to make better digital art. These tips cover the three areas that trip up most new users, and working through them helps you get the full use out of the app.
Navigating the Interface
Knowing the Procreate interface matters if you want to work smoothly on digital art. Here are practical tips for getting around it:
- Use gesture controls to zoom in, rotate, and move around your canvas quickly.
- Learn the quick menu so you can reach the tools and actions you use most.
- Set up your workspace by arranging palettes, brushes, and tools to fit how you work.
- Use the touch shortcut feature to speed up common steps.
- Keep up with software updates, which fix performance issues and improve the app.
Utilizing Different Brushes
Procreate has a wide range of brushes you can use in many ways. Here are tips for getting the most out of them:
- Try different brush types, such as sketching, painting, and texture brushes, to get different effects and styles.
- Adjust brush opacity and size to add depth and dimension to your artwork.
- Combine brushes to make your own textures and patterns in an illustration or design.
- Use specialized brushes like smudge or blending brushes to mix colors and create smooth transitions.
- Try customizing brush settings to match your own style and preferences.
- Use the eraser tool along with different brushes to refine details and make precise fixes.
- Use imported brushes, including ones from the Procreate community, to expand your toolkit.
Mastering Layers
After you get comfortable with brushes, the next step is learning the layering system, which is key to advanced digital art in Procreate. Here are the tips that matter most:
- Understand the Purpose of Layers
- Organize Your Layers
- Experiment with Blend Modes
- Utilize Alpha Lock and Clipping Masks
- Work Non – Destructively
- Group Layers for Organization
- Experiment with Layer Opacity and Blending Options
- Benefit from QuickShape Feature for Precision
Conclusion
Learning Procreate opens up a lot of options for digital artists. Getting to know the interface, trying out different brushes, and handling layers are the steps that build your skills.
Put Procreate’s tools and advanced features to use and your digital art will improve. The more you work with the brushes, the layering system, and the gesture controls, the more they become second nature. With steady practice, you can get a lot done on this platform.
Keep refining your techniques and see how far you can take digital art with Procreate on your iPad.
(Image Credit: Procreate)
Frequently Asked Questions
How do I start a new project in Procreate?
To start a new project, open the Procreate app, tap the + icon at the top right corner of the Gallery interface, and select New Canvas.
Can I import custom brushes into Procreate?
Yes, you can import custom brushes by tapping on the brush icon, selecting Import, and choosing the desired brush set from your files.
What are some essential tools for digital art creation in Procreate?
Essential tools include various brushes (pencil, paintbrush), layers for organization, blending modes for effects, and selection tools for precise editing.
Is it possible to undo mistakes while working in Procreate?
Yes, you can undo mistakes by tapping two fingers on the canvas or using the quick gesture: swipe left with three fingers, to quickly undo actions.
How can I export my artwork from Procreate once it’s finished?
To export your artwork as an image file or share it via email or social media platforms directly from Procreate, tap on Share located under Actions within the Gallery interface.

- Independent picks for exactly what you just read about
- Matched to your team size & needs
- Vendors don't pay for placement
Step 1 of 4
How big is your team?
We tailor recommendations to companies your size.














Related Articles
Accounting Software
How To Choose The Best Procure-to-Pay Software For 2026
Continue reading →
Accounting Software
Best QuickBooks Alternatives in 2026: Top Accounting Software Options
Continue reading →

Accounting Software
How To Choose The Best Interior Design Software For 2026
Continue reading →
Accounting Software
Free Design Tools: Say Goodbye to Boring Invitations in 2026
Continue reading →